
| Creating Partition Disk Volume |
Physical disk device is mapping the disk partition to an iSCSI disk. In this case, user can perform low level disk operations on the iSCSI disk, for example, changing the partition of the disk and format partition with new file system, this is a way to share your existing data or game data to boot clients.
Follow the steps below to create a physical disk volume:
Step 1. Choose iSCSI Media Type
Right click the Virtual Volumes node on the left tree of the SANDeploy Management Console. From the pop-up menu select the Create Virtual Volume... menu item.

Choose Disk Partition.
Press the
Next
button to continue.
Step 2. Select Partition
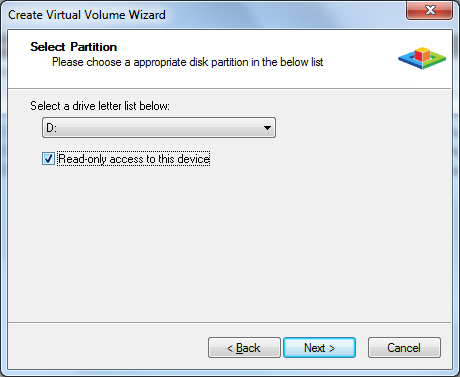
User can select drive letter partition list.
Read-only access to this device represent the volume is used for read-only purpose, otherwise SANDeploy need to open this drive for exclusive full-access.
When you enable the read only option, you can also specify write-back cache to make client writable.
Press the Next button to continue.
Step 3. Set High Speed Cache

User can choose whether use the cache by clicking the Enable high speed cache on this volume option button.
Cache size, represent the
cache limitation on the volume.
Cache expiry time, represent how long the
cache data will be saved to hard disk.
We recommend user to use cache enabled if the volume is a diskless boot volume, that will allow to get better performance.
Press the Next button to continue.
Step 4. Set Write-Back Cache
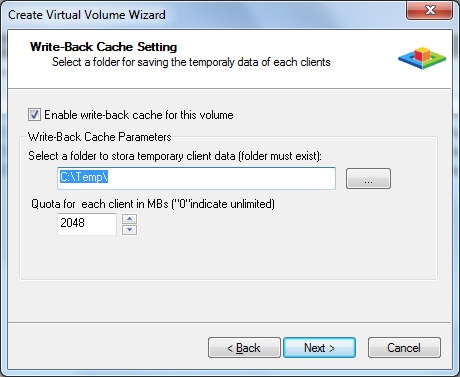
The Write-Back cache feature is used for saving data for workstations that have normal permission.
If user use two or more workstations, to enable boot from the same iSCSI volume, the write-back cache must be enabled.
Click the Enable write-back cache
for this volume option button to decide the write-back
cache is enabled.
Select a folder to store temporary data, folder must
already exist.
Quota for each client, represent that the maximum size of data
that client write.
Press the Next button to continue.
Step 5. Finish Volume Creating.
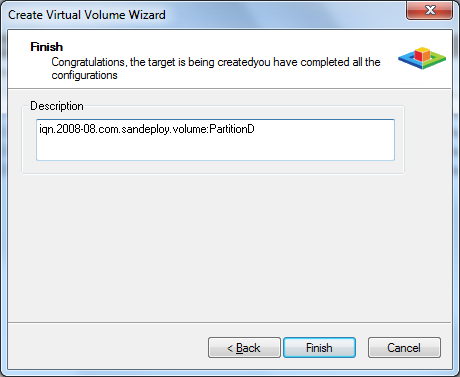
Type the volume description, the description will be used for helping user to recognize volume.
Press Finish button to complete the volume creation.
- Online Help
- Installing SANDeploy Boot Server
- General Configuration
- Creating Target
- Creating Standard Image Volume
- Creating Target Using Physical Optical Drive
- Creating Partition Disk Volume
- Creating Physical Disk Volume
- Createing SPTI (SCSI Pass Through Interface) Volume
- Create Virtual CD/DVD Volume
- Creating VMDK Image Volume
- Boot Settings
- License Settings
- Target Settings
- Volume Settings
- User Management
- Group Management
- Workstation Management
- Starting and stopping servers
- Uninstalling SANDeploy Boot Server